← Maali Uncle website par wapas
Radish Microgreens Growing Guide: The Fastest First Tray
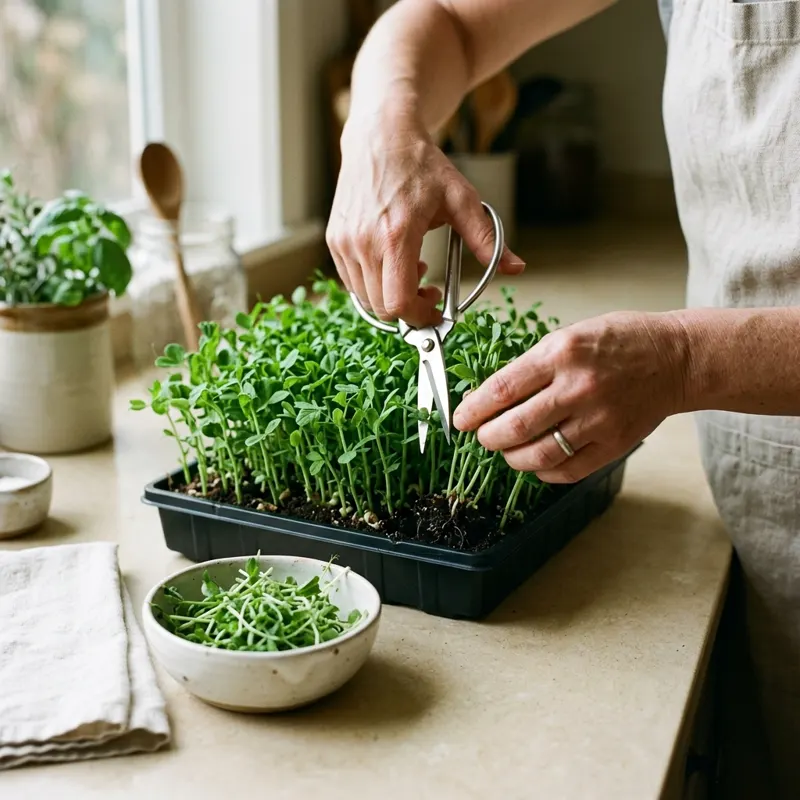
Radish microgreens are the fastest win in home growing: sow today, cut in five to seven days. The flavour is peppery and bright, the stems often blush pink, and the method is forgiving enough for a first tray. No soaking, no weight, no special equipment — a shallow tray, cocopeat, seed and a bright windowsill are enough. This guide covers the steps and the small details that decide whether the tray is mild and tender or tough and too hot. For the general method, see the full tray method; for choosing your first seeds, see best microgreen seeds for beginners.
Quick answer
- Seed: food-grade, untreated radish seed sold for sprouting or microgreens — never seed dressed with fungicide or chemicals.
- Soak: none needed. Sow dry seed directly.
- Sow: scatter evenly and thinly on moist cocopeat or fine potting mix; a light covering of medium helps.
- Blackout: cover with a second tray or board for 1 to 2 days, until germination shows.
- Light: bright indirect light once uncovered; the stems colour up best with good light.
- Harvest: about 5 to 7 days after sowing, when the cotyledons are open and the first true leaves are just appearing.
Step 1 — Seed and tray
Buy radish seed sold for sprouting or microgreen use, food-grade and untreated. Many varieties work; the common red radish types give the familiar pink stems, while white daikon types are milder and grow a little taller. Buy a small pack first and check the packing date — fresh seed germinates in a day or two, old seed lags and thins the tray. Use a shallow tray about 3 to 5 cm deep with drainage, filled with moist cocopeat or a fine, sieved potting mix, levelled flat.
Step 2 — Sow thinly and evenly
Scatter the seed evenly across the surface — thinly enough that you can still see patches of medium between seeds. Radish seed is small, so it is easy to over-sow; a crowded tray grows thin, leggy stems that fall over. Press the seed gently into the medium with a flat board or your palm, then cover with a very light dusting of the same medium, or leave uncovered and mist well. Either works; the light covering helps keep moisture even in dry weather.
Step 3 — Cover for a day or two
Place a second tray or a board over the top to keep the seed dark and moist while it germinates. Check after a day: tiny white roots and the first pale shoots should be showing. Lift the cover once most of the seed has sprouted — usually within 1 to 2 days. Leaving the cover on longer makes pale, stretched shoots; lifting it too early dries the surface. In a cool Delhi winter the tray may take a day longer; in summer heat it may be ready in a day.
Step 4 — Light and water
Move the tray to bright indirect light — a windowsill with morning sun, or a shaded balcony shelf. Radish colours best with good light: pale, stretched stems mean it needs more. Water from below where possible — set the tray in a shallow dish for a few minutes and let the medium draw the water up — or mist gently from above in the morning only. The medium should stay moist, never soggy; a tray that sits in water rots at the base, and a tray that dries out mid-day stalls.
The spice level: harvest timing decides it
Radish heat builds as the plant grows. Cut at five days and the greens are mild and tender; cut at seven or eight days and they are properly peppery. The variety matters too — daikon types stay milder, red radish types get hotter. If a tray tastes too strong for your family, harvest a day earlier next time and use it as a garnish rather than a salad base. If it tastes too mild, give it one more day of light before cutting. The harvest window is short: a day late and the stems toughen, a day early and the flavour has not arrived.
Common problems
Leggy, pale stems: too little light, or the cover left on too long. Move to brighter light next tray. Thin, patchy growth: old seed, or sowing too thickly in some spots and too thinly in others. White fuzz on the medium: usually harmless root hairs — radish grows fine white root hairs that look like mould. Check for smell: root hairs smell fresh, mould smells sour. Improve airflow and water from below if you are unsure. Falling over: stems that are too long and thin have usually had too little light; sow thinner and uncover sooner next time.
Step 5 — Harvest and use
Cut with clean scissors just above the medium when the cotyledons are fully open and the first true leaves are just appearing — usually day five to seven. Rinse gently, shake dry, and use the same day: in salads, sandwiches, wraps, or sprinkled over dal, chaat and curd. Radish microgreens keep a day or two in the fridge in a dry container lined with a cloth, but they lose crispness fast. Do not try to regrow a cut tray — microgreens are a single-harvest crop; start a fresh tray instead, and stagger sowing by a few days for a steady supply.
FAQs
Do radish microgreens need soaking? No. Sow the seed dry, straight onto moist medium. Soaking adds nothing for radish and can make the tiny seed clump.
Are the pink stems normal? Yes — many radish varieties colour pink or red in the stems, especially in good light. It is a sign of a healthy tray, not a problem.
Can children eat radish microgreens? Yes, in normal food amounts — they are simply young radish plants. Harvested young, they are milder than mature radish. As with any fresh produce, rinse before eating.
Ready for a contrast? Try the nutty crunch of sunflower microgreens, or read what microgreens are for the full picture.
Is page ko Maali Uncle app mein kholo: app mein kholo