← Maali Uncle website par wapas
How to Grow Microgreens at Home: The Full Tray Method
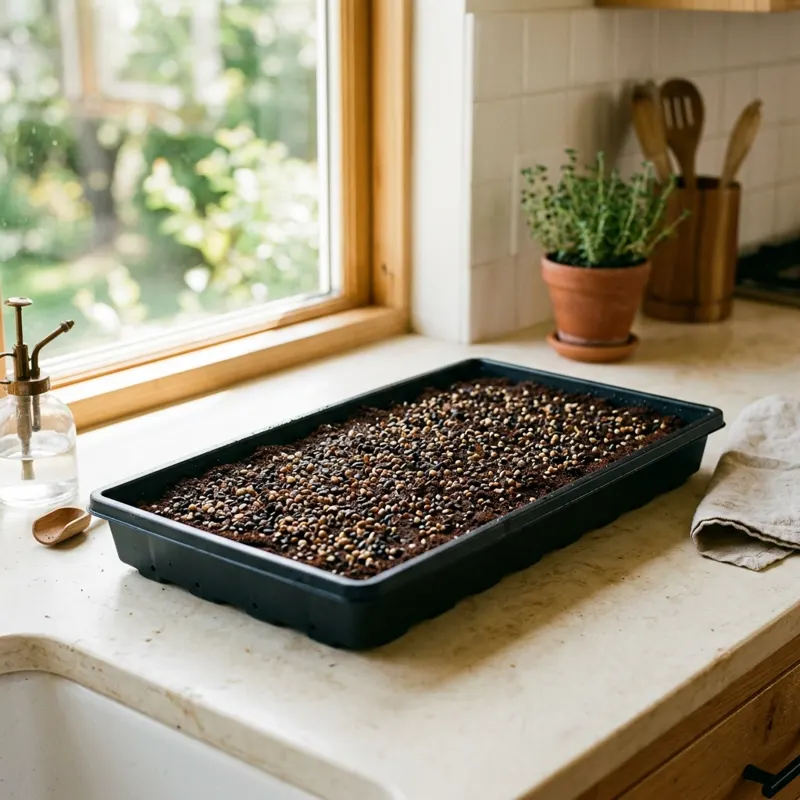
Microgreens reward a small amount of care, done in the right order. You do not need a garden, a grow light or any special equipment to start — a shallow tray, a bag of cocopeat, food-grade seed and a bright windowsill are enough. This guide walks through the full tray method, step by step, with the honest timings and the mistakes that most often ruin a first tray. If you are new to the idea itself, start with our explainer What Are Microgreens? first.
What you need
A shallow tray about 3 to 5 cm deep, with drainage holes or a second tray underneath to catch water. A growing medium — moist cocopeat or a fine, sieved potting mix works well (see What Is Cocopeat?). Food-grade, untreated seed sold for sprouting or microgreen use — never seed dressed with fungicide or chemicals. A mister or a jug for gentle bottom watering, clean scissors, and a second tray or a board to use as a cover. Our Microgreens section shows the starter set and the beginner varieties.
Step 1 — Choose the seed
Start with the forgiving crops: radish and mustard for speed and a peppery bite, methi (fenugreek) for its familiar aroma, and sunflower for crunch. These germinate reliably in Indian room temperatures and forgive small watering mistakes. Save slower or fussier crops — basil, amaranth, coriander — for your second or third tray, once you know how your windowsill light and watering rhythm behave. Buy seed packed for microgreens or sprouting, and check that it is untreated.
Step 2 — Soak, where it helps
Large, hard-coated seeds benefit from a soak; small seeds usually do not need one. Sunflower seed, for example, is typically soaked for around 8 to 12 hours before sowing. Radish, mustard and methi are generally sown dry. If a seed packet gives a soak time, follow it; if it does not, sowing dry is the safe default for small seed. After soaking, drain well — seed sitting in water goes sour fast.
Step 3 — Prepare the tray
Fill the tray with a thin, even layer of moist medium, about 2 to 3 cm deep, and press it flat so the surface is level. The medium should feel like a wrung-out sponge — damp through, not dripping. A lumpy or uneven surface gives patchy germination, with bare spots next to crowded clumps. If you are using cocopeat, rinse it first and let it drain; our cocopeat guide explains why.
Step 4 — Sow evenly
Scatter seed densely in a single layer, so the seeds sit close but not piled on top of each other, then press them lightly into the medium so they make good contact. Overcrowding is the most common beginner mistake — seed packed too tight traps moisture, blocks airflow and invites mould. Mist the surface gently, then cover the tray with its lid, a second tray or a board. The cover keeps things dark and humid for germination; keep a little weight on it if you can, as gentle pressure helps roots anchor and stems grow straight.
Step 5 — Light and water
Check daily. Once most seeds have sprouted — usually in 2 to 4 days, depending on the crop and the temperature — remove the cover and move the tray into bright, indirect light, such as a windowsill without harsh afternoon sun. Water gently from below or with a fine mister, keeping the medium moist but never soggy. A tray that stays wet grows mould; a tray that dries out stalls. Good airflow around the tray matters as much as water — a closed, stuffy corner is where problems start.
Step 6 — Harvest
Harvest with clean scissors, cutting just above the medium, once the cotyledons (seed leaves) have opened and the first true leaves are appearing — usually 7 to 21 days after sowing, depending on the crop. Rinse the cut greens, shake off the water, and chill them in a clean, dry container. Eat within a few days for the best flavour. Most microgreens give one harvest per sowing, so sow a fresh tray rather than waiting for regrowth that rarely comes. Stagger two trays a few days apart and you harvest in small batches instead of one glut.
Troubleshooting a tray
White fuzz on the medium: usually mould from overcrowding, overwatering or poor airflow. A mouldy tray should be discarded, not salvaged — compost it and start clean, sowing a little thinner next time. (Fine white root hairs on some crops, such as radish, can look similar; if it smells off, it is mould.) Pale, leggy seedlings: not enough light — move the tray brighter, but out of harsh midday sun. Patchy germination: uneven sowing or an uneven, dry medium surface; level and moisten the medium properly next time. Seedlings falling over: usually damping-off from a soggy medium — water less, ventilate more, and use a clean tray each time.
FAQs
Can I reuse the medium? Used medium can be composted, but for food grown to be eaten raw it is best to start each tray fresh — old medium carries mould spores and spent nutrients. Do I need grow lights? Usually not to start; a bright windowsill grows most beginner varieties. Can I grow microgreens on a balcony? Yes, in a sheltered spot out of harsh sun and heavy rain — a windowsill is simply easier to control. How much seed per tray? It varies a lot by crop — follow the packet, and sow thinner rather than thicker until you know the variety. Is it safe to eat raw? Yes, when the seed is food-grade and untreated, the water is potable, and trays and scissors are cleaned between sowings — see the food-safety section of What Are Microgreens?.
Want a first tray set up properly on your windowsill? Book an Expert Maali — a short visit saves a season of wrong trays.
Is page ko Maali Uncle app mein kholo: app mein kholo